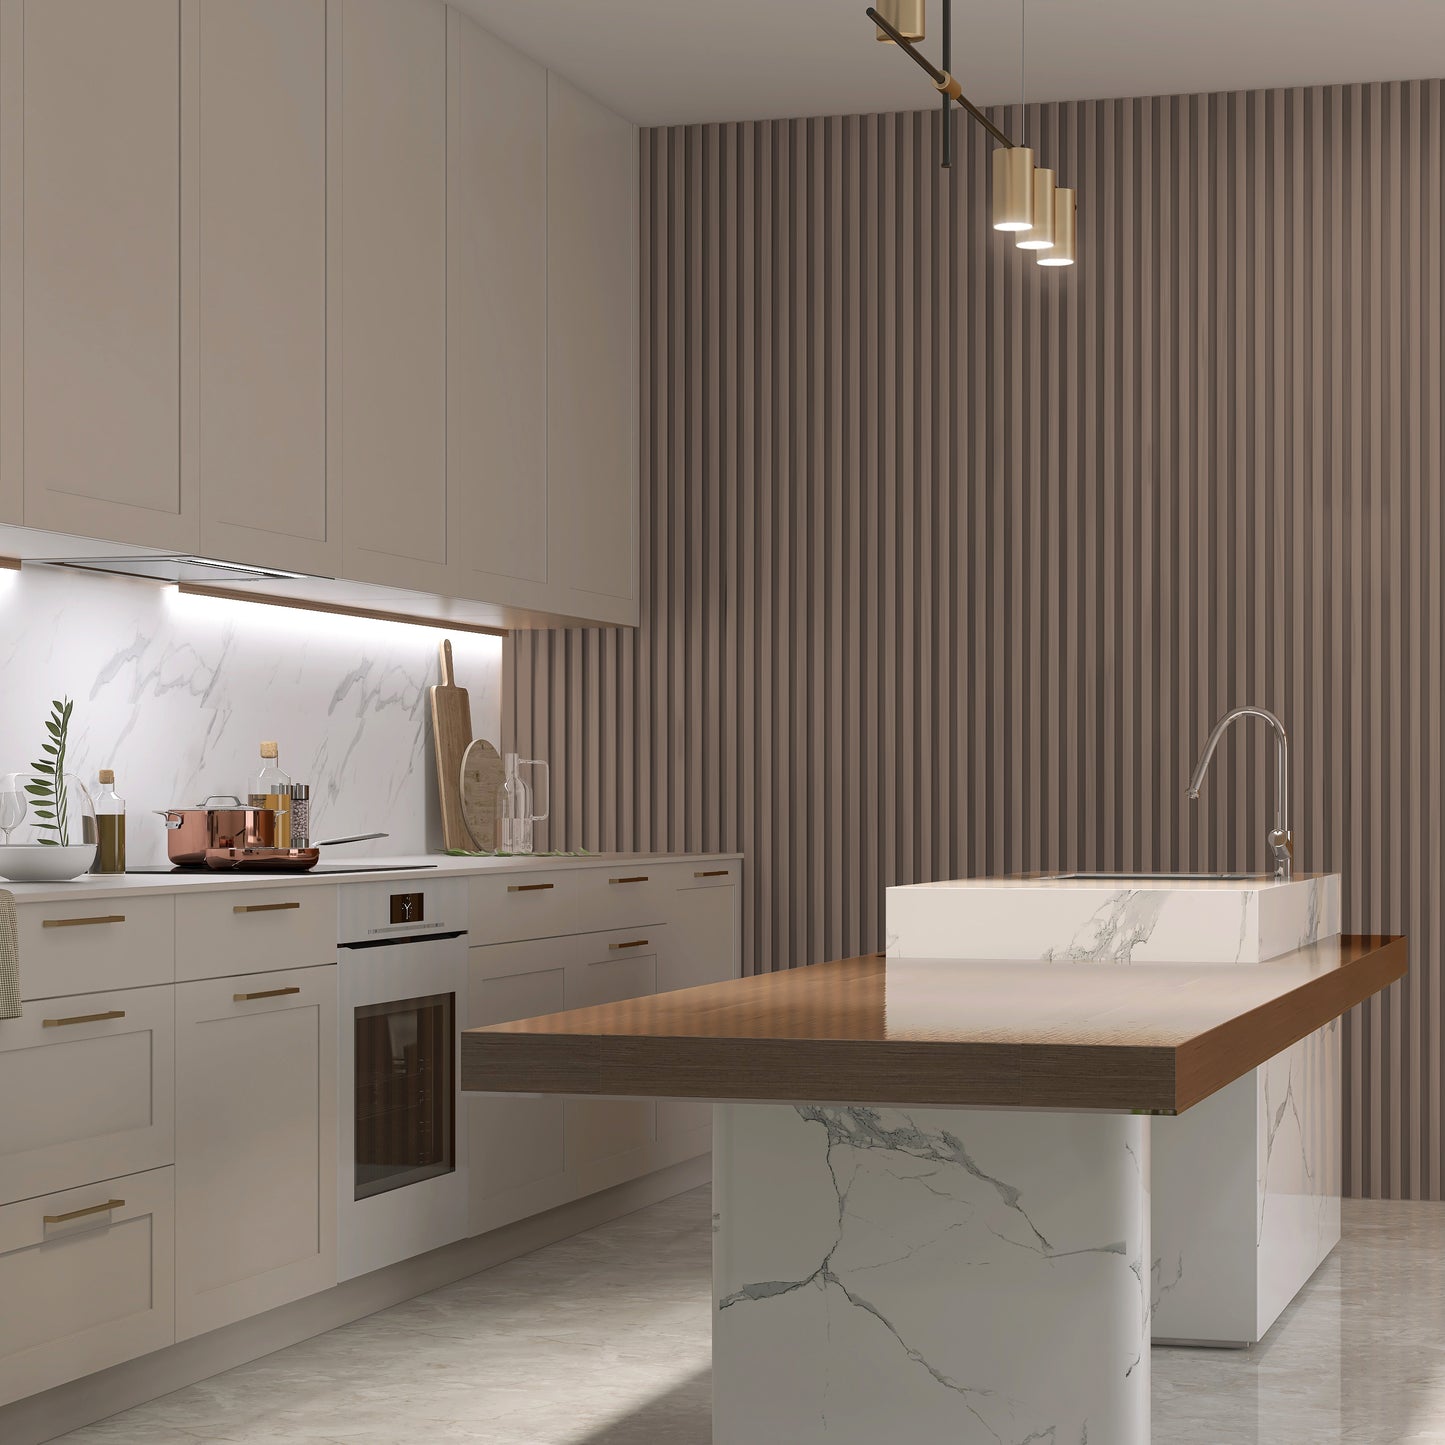
Discover the beauty of our premium interior panels, designed to elevate your space with style and sophistication. Crafted from high-quality materials, our panels are available in an exquisite array of finishes, colors, and textures, allowing you to create a truly bespoke look. With easy installation, sound insulation, and moisture resistance, our panels are the perfect choice for adding character to any room, whether it's a striking accent wall, a cozy living space, or a contemporary office environment. Personalize your surroundings and make a statement that reflects your individuality with our exceptional panels.
Material: Wood-plastic Composite Environmental Material
Color/Finish: Textured Finish
Board Joint Type: Tongue and Groove with Clip
Installation Type: Mechanical Fastening and adhesive installation
Product Feature:
- Durable Wood-Plastic Composite with Textured Finish
- Versatile Applications: Walls, Ceilings, Partitions, and Accent Walls
- Tongue and Groove Design with Clip for Easy Installation
- Mechanical Fastening and Adhesive for Strong, Secure Attachment
- Sound Insulation and Moisture Resistance
- Customizable Finishes, Colors, and Textures
- Eco-Friendly, Sustainable Materials
- Suitable for Indoor and Outdoor Use with Expansion Spacing
- Minimal Maintenance and Long-Lasting Durability
Product Specifications:
Plank Size: 9.51 Ft. / 114.17 in
Plank Width: 0.558 Ft. / 6.69 in
Plank Thickness: 0.24 in
Actual Product Height: 0.94 in
Actual Product Width: 6.69 in
Slats/Plank: WPC Fluted
Slat Size: 0.71 in
Slat Distance: 0.82 in
Item Weight: 5.43 lb.
Product Installation:
WPC Wall Panel Installation Guide
1. Measure the Wall
- Accurately measure the area where the panels will be installed, noting obstacles such as windows or doors.
- Mark the placement areas for the panels.
2. Cut the Panels According to Measurements
- Use a saw or suitable cutting tool to cut the WPC panels to the required sizes.
- Ensure precise cuts for a seamless finish.
- Tip: Measure twice to avoid cutting errors.
3. Prepare Max Bond with Silicone Adhesive Glue
- Use Max Bond adhesive and silicone for a strong, durable hold.
- Prepare the adhesive according to the manufacturer's instructions.
4. Apply Adhesive to the Panel
- Turn the WPC panel over to its backside.
- Evenly apply adhesive, focusing on the edges and the middle to ensure a strong bond.
5. Place and Press the Panels onto the Wall
- Position the panel on the wall and press it firmly in place.
- Use a level to ensure proper alignment before the adhesive sets.
- Tip: Apply even pressure for a secure bond.
6. Allow 24 Hours for the Adhesive to Dry
- Let the adhesive cure completely before proceeding to ensure the panels remain securely attached.
7. Install the Keel on the Wall
- Once the adhesive has dried, install the keel (support structure) on the wall.
- Ensure the base is flat and level, as it serves as the foundation for the panels.
- Secure the keel with nails or screws.
8. Fix the First Panel with a Nail Gun on the Keel
- Place the first WPC panel on the keel and fix it with a nail gun.
- Ensure there are no gaps or misalignment.
9. Insert the Next Panel into the Slot and Secure
- Slide the next panel into the slot of the first panel, ensuring a snug fit with no visible gaps.
- Fix it to the keel with a nail gun, repeating the process for the remaining panels.
- Tip: For outdoor installations, leave space for expansion due to temperature changes.
10. Continue with the Rest of the Panels
- Continue inserting panels into the slots and fixing them to the keel until the wall is fully covered.
- Regularly check alignment to ensure panels remain straight and even.
- Tip: Remove excess adhesive immediately to prevent residue buildup.
By following these steps, you can achieve a professional, durable, and aesthetically pleasing WPC wall panel installation.
Shipping and Return:
Choosing a selection results in a full page refresh.